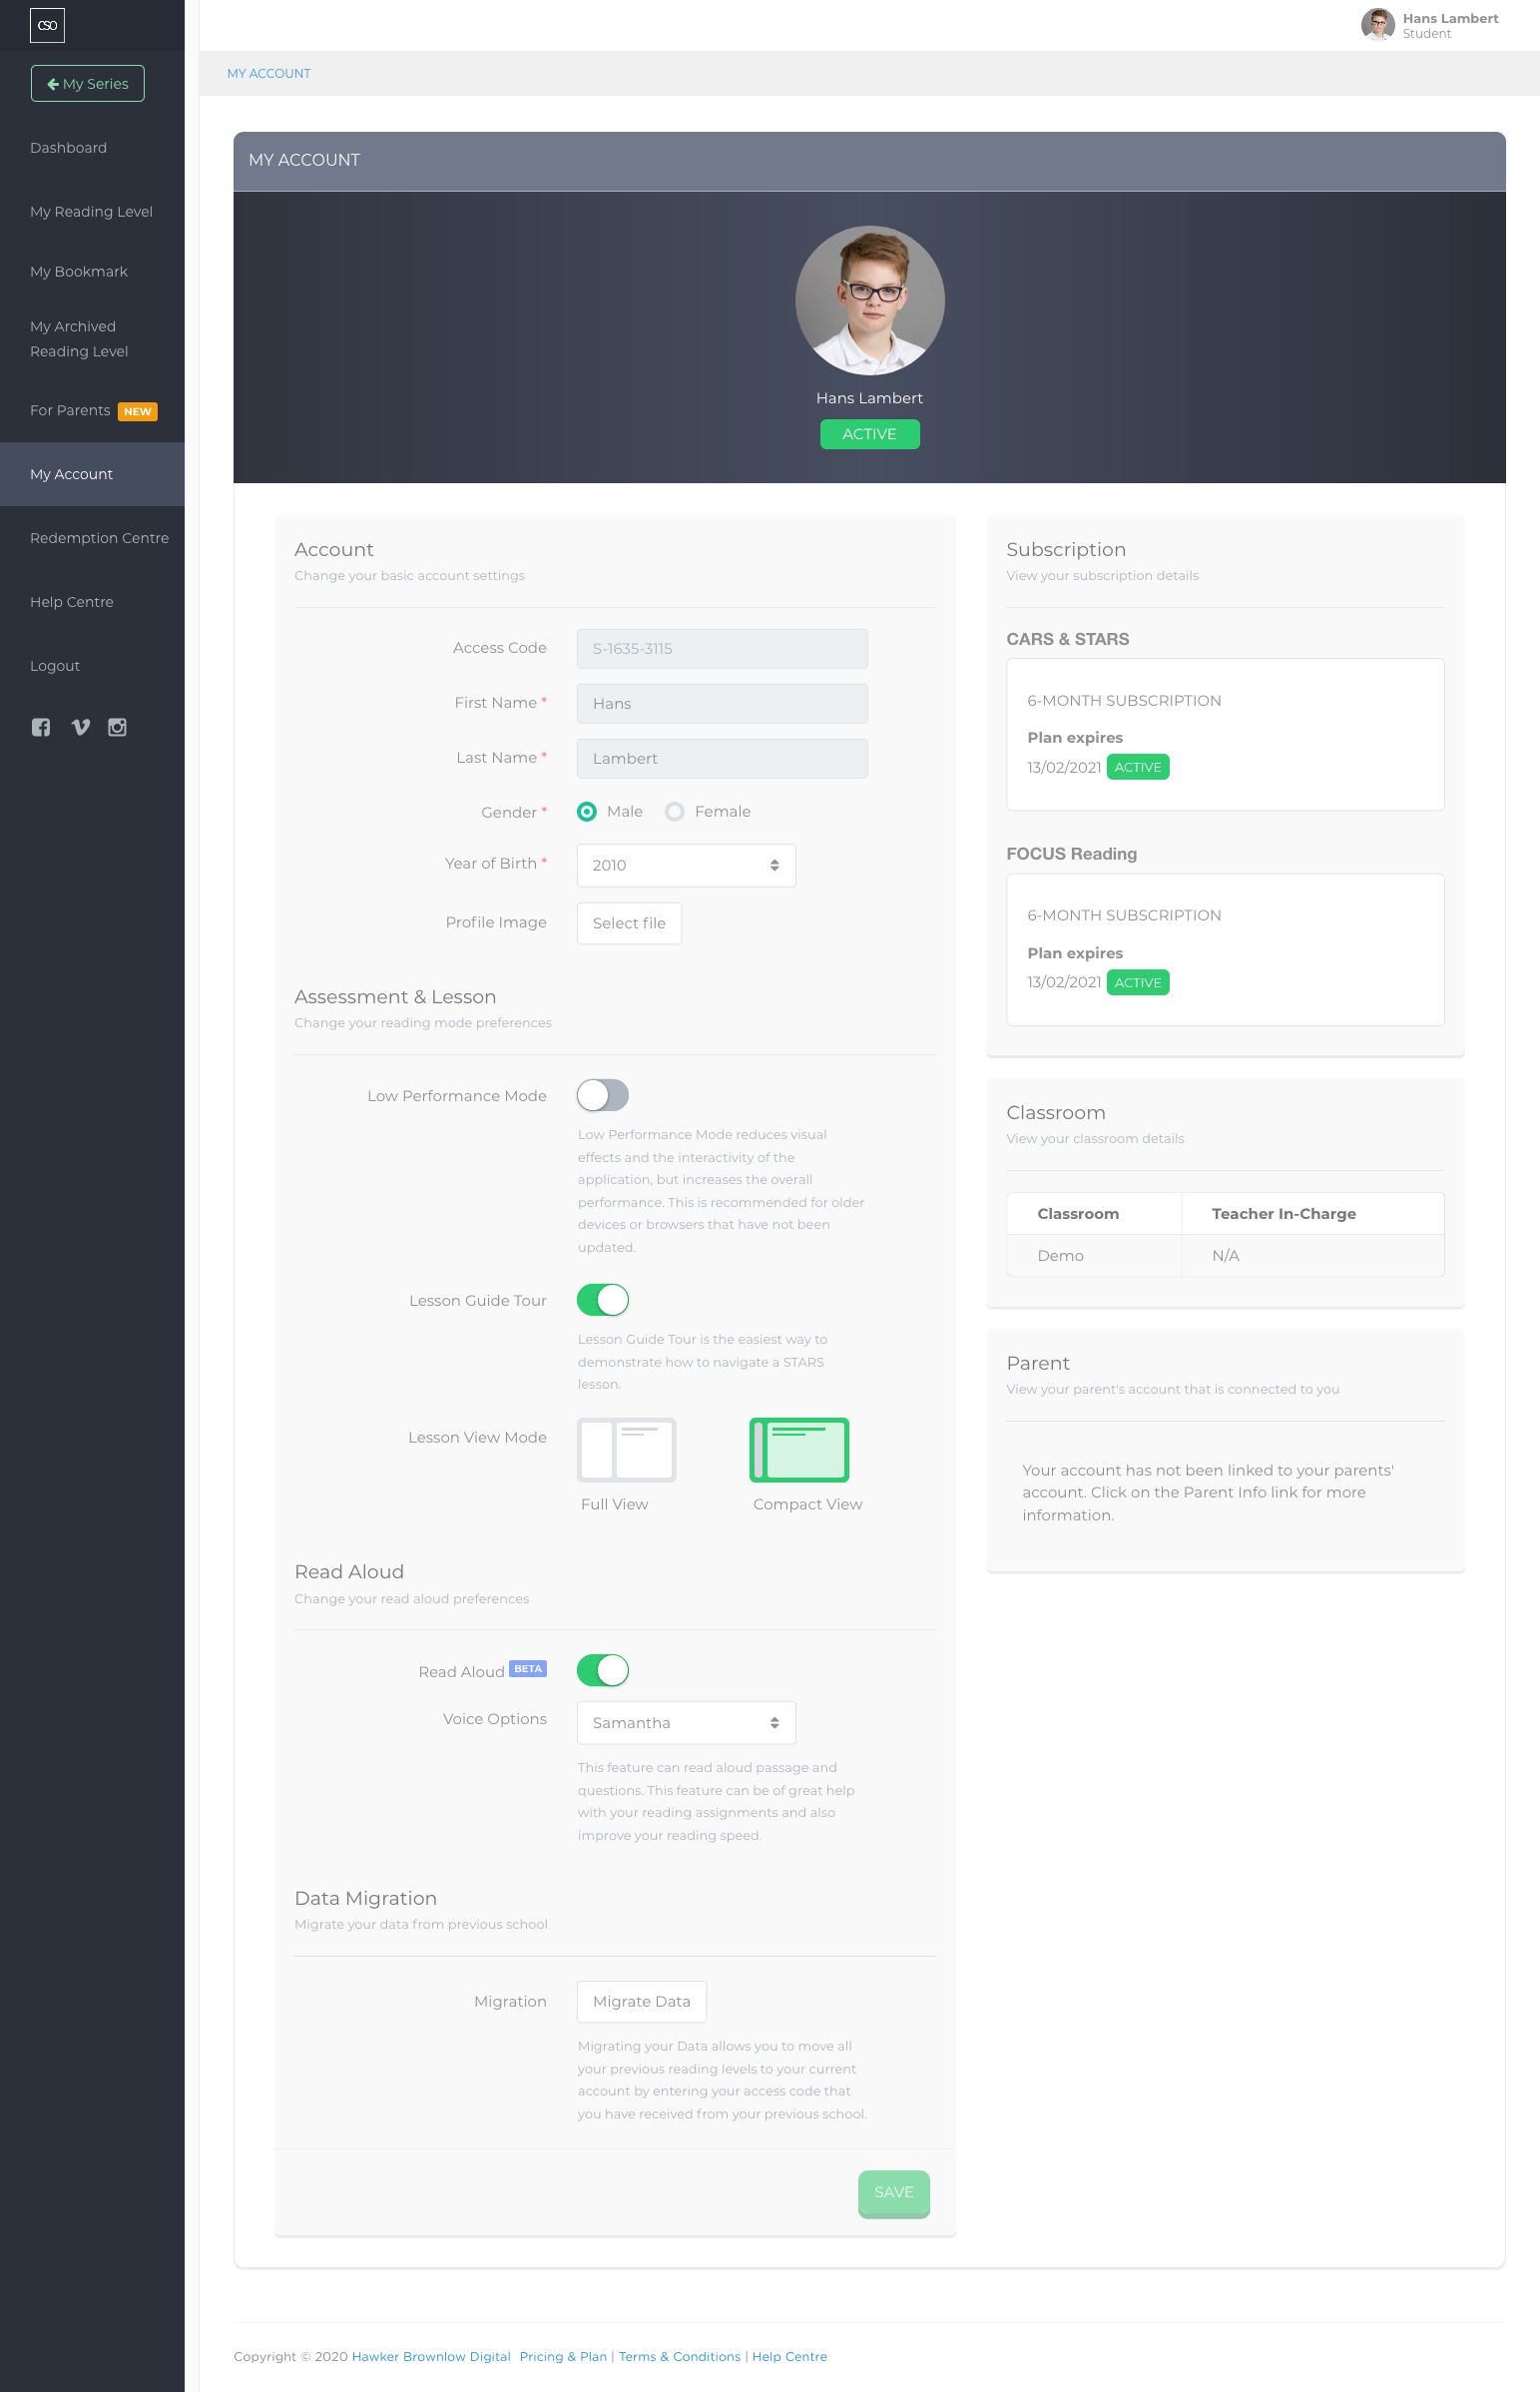
This section will allow you to change your student's details and application settings.

Basic Account Settings
Students are not allowed to change their First Name and Last Name. Here you can change your student's basic account settings such as: Gender, Year of Birth and Profile Image.
Please Note: Access Code and Expiry Date will be greyed out, as they cannot be changed.
Application Settings
By default, the assessment application will run in High Performance Mode. If the students are experiencing a significant performance issue, please switch over to Low Performance Mode.
Low Performance Mode reduces visual effects and the interactivity of the application, but increases the overall performance. This is recommended for older devices or browsers that have not been updated.
Select this option if your browser is running slowly or not loading the pages. Click on Save after you have selected the option.
Here you can change your settings for the Lesson Guide Tour. You can disable and enable the tour on the Table of Contents page by setting the switch to on or off.
Subscription Details
This shows the current subscriptions for CARS & STARS and FOCUS Reading that are associated with the student’s account, their current status and expiry dates.
Class Details
Students can view which Class they are listed in as well as the Teacher In-Charge for those classes.
Please note that only Teachers can edit, move or change the student's class.
Parent
Students can view which Parent Account is connected/linked to their account.
If they do not have a parent linked to their account and their parent would like to do so, select the Parent Info in the side bar menu to contact Hawker Brownlow Digital for more information about linking them with a Parent account.
Migration
Migrating your assessments and lessons allows you to move a previous school's assessments and lessons to your current school's account by entering the access code that you received from the previous school. If you wish to migrate your data, click on the Migrate Data button and you will be redirected to the Data Migration Assistant. Once you have migrated your data, the Migrate Data button will turn to Data Migrated, indicating that your assessments and lessons have been successfully migrated.
Data Migration Assistant
On the Data Migration Assistant page, you can type in the Access Code that you have received from your previous school. This is to ensure that assessments from your previous school are migrated across to the current school. Click on Submit after typing in the Access Code. You may skip this process if you do not wish to migrate by clicking on the Return to My Account button, which will take you back to the My Account page.
Comments
0 comments
Please sign in to leave a comment.